Tuesday, November 1, 2011

Red Wine Chocolate Cake


It has been so long since I have posted a new recipe and it saddens me.  However, I have a good excuse ... excuses.  First, we are redoing our kitchen so I cannot bake a lot.  Second, I have been going on job interviews, which has taken up a lot of my time.  But I managed to bake last night ... FINALLY!!!

The occasion for this cake is bittersweet because we had a going away lunch for a co-worker.  Sad to see her go, but she is moving on, so it was a little celebration, too.  I wanted to make her something because I appreciate everything that she has done for me during my internship and she is an awesome person!  What kind of cake should I bake for the occasion?  I had no idea.  Then I came across a great blog, The Pastry Affair, which featured a Red Wine Chocolate Cake ... umm, yes please!

I really wanted to try this recipe because it sounded so delicious.  She baked the cake in a loaf pan, but I decided to bake it in a 9" spring form pan and it worked out perfectly.  The cake is everything that she said it would be and I am so happy that I made it.  Everyone really enjoyed it, too, and yet was surprised by the red wine flavor/aroma.


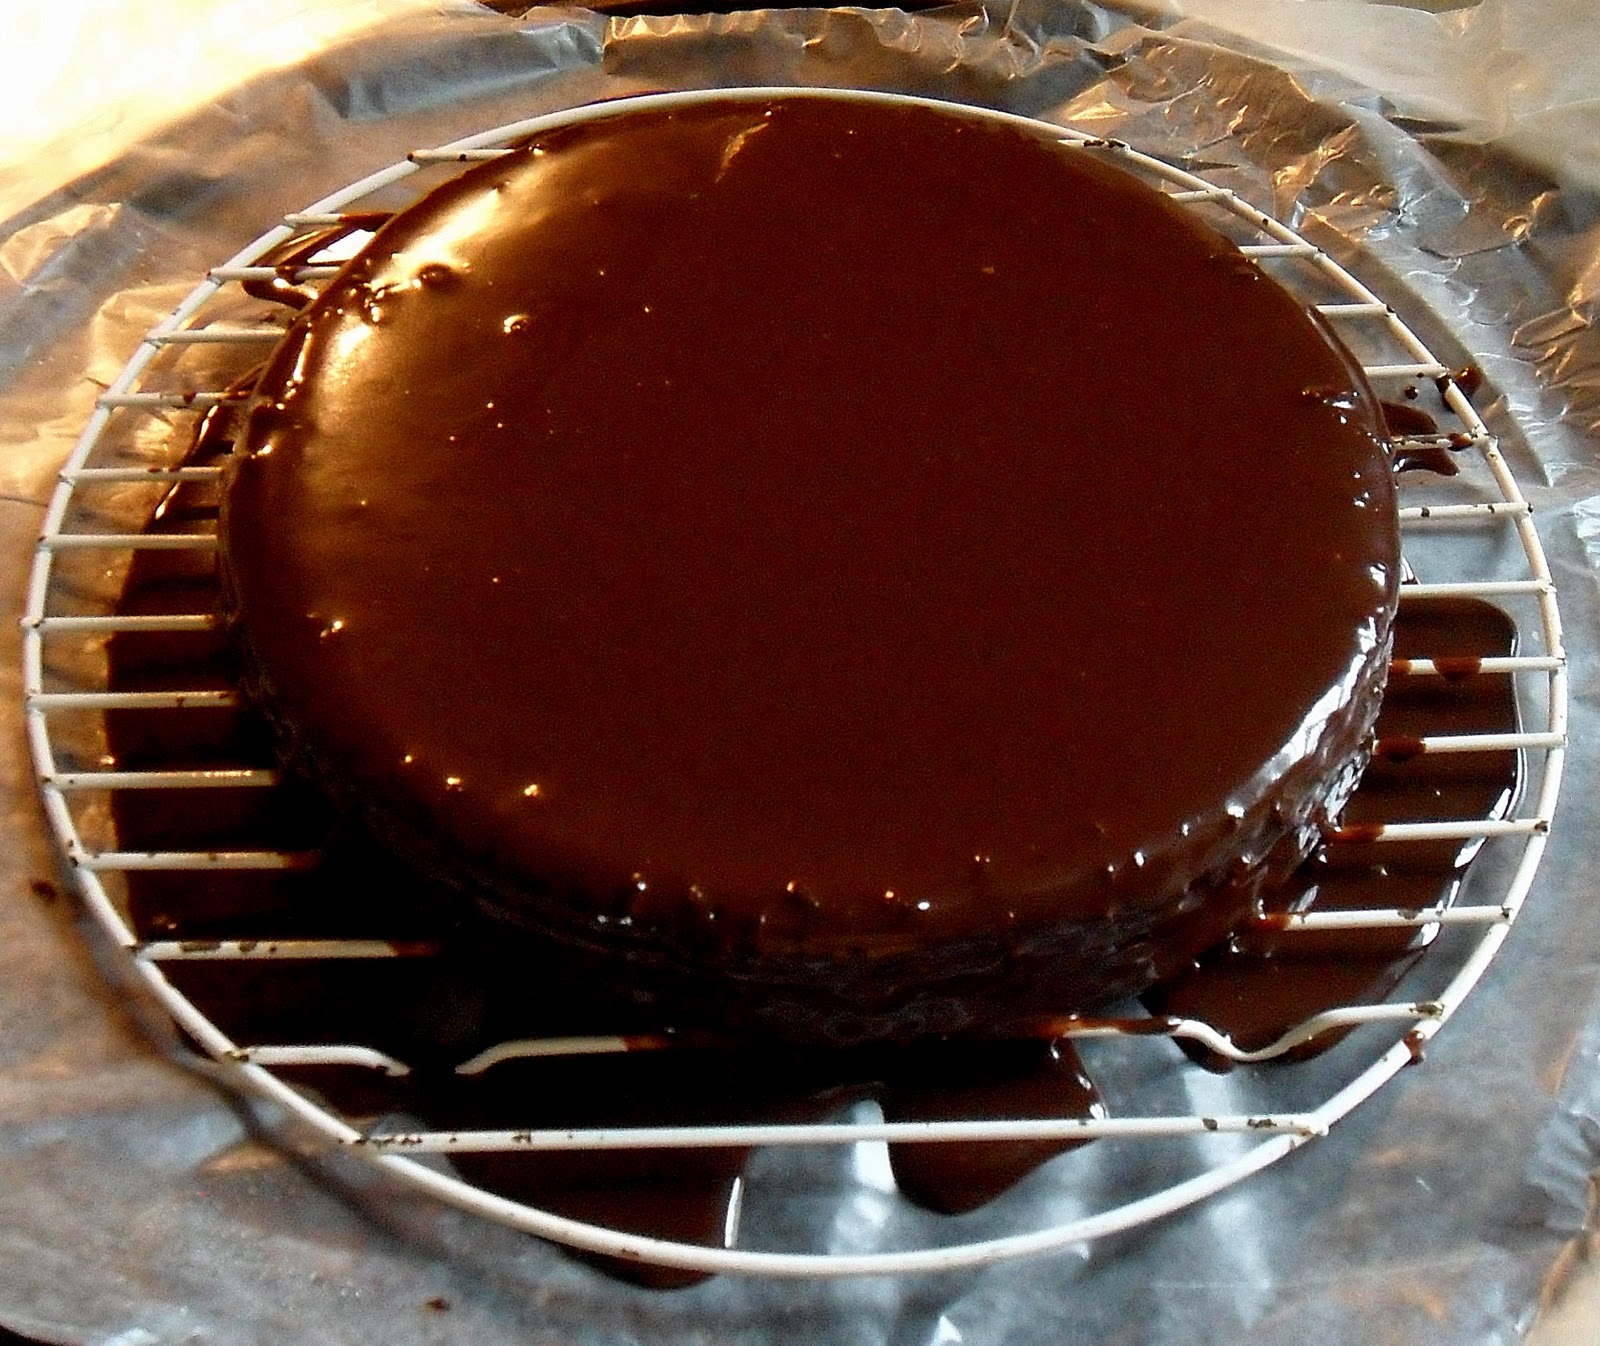
The cake is so moist and soft and fluffy.  It is rich in both chocolate flavor and red wine.  You smell the red wine and taste it right away, but then it quickly disappears and leaves you with the rich chocolate flavor that lingers in your mouth.  You really don't need to frost it, actually I think that it might take away from the cake.  I served it with a light sprinkle of confectioners' sugar and it was perfect.  It is not sweet at all, which is great because I think it would conflict with the richness of the wine and chocolate.

It was hard for me to think of a "celebration"/"good bye" cake, but when I came across this recipe I knew it was the right one.  You have the wine and the chocolate in one bite, no need for a glass of wine or bubbly .... but you might want to have a glass of milk :)


I encourage you to make this cake, enjoy it, and happy baking!


Red Wine Chocolate Cake
(adapted from The Pastry Affair)

½ cup butter, softened
¾ cup light brown sugar
¼ cup granulated sugar
1 large egg
¾ cup red wine
¼ cup light sour cream
1 teaspoon vanilla extract
1 ¼ cups all-purpose flour
3 tablespoons cornstarch
¾ cup cocoa powder
¼ teaspoon baking soda
½ teaspoon baking powder
½ teaspoon salt

Preheat oven to 325*F and prepare a 9” circular pan (I used a 9” spring form pan).
In a large mixing bowl, cream together the butter and sugars. Add the egg and vanilla extract and beat until smooth. Beat in the wine and sour cream (It might looked curdled, that is OK).

In a separate bowl, whisk together the flour, cornstarch, cocoa powder, baking soda, baking powder, and salt. Add to wine mixture slowly, mixing until just incorporated.

Pour batter into prepared baking pan and bake for about 45 minutes, or until a toothpick inserted into the center comes out clean and the cake bounces back slightly (begin to check around 40 minutes). Allow to cool in the pan for 10 minutes, before transferring to a cooling rack to cool completely.

Serve with a whipped frosting or sprinkle with a little confectioners’ sugar.

Wednesday, October 5, 2011

Is it a Chocolate Flourless Cake or a Fudgey Brownie?


That is the ultimate question.  It is supposed to be a chocolate flourless cake, but the end result is like a fudge cake ... I don't know how it works but I know that it tastes divine!

The cake is flourless and rich and dense and enveloped with a decadent ganache that, when set and slightly chilled, becomes a melt in your mouth, may i please have more piece of fudgey cake!!!


This recipe comes from Aaron McCargo on the Food Network.  I always try to change recipes to make it my own, but I have not messed with this recipe.  I would not know where to begin, nor would I want to try because it is perfect.

I will give you some pointers, though:

1.  make sure you have a spring form pan
2.  prepare the spring form pan by spraying it well and placing a piece of parchment paper on the bottom
3.  let it cool before turning it out onto another tray
4.  be patient when turning it out - the cake is finicky and will break if not careful

If you like rich, decadent, melt-in-your-mouth chocolate then PLEASE try this cake.  I cannot explain how good this cake is.  I make it at the restaurant and for catering events, too.  It is a winner!!!


Enjoy and happy baking!

Chocolate Flourless Cake
(makes one 8" circle cake)
 
  • 4 ounces bittersweet chocolate, chopped
  • 1 stick cold butter
  • 1 teaspoon vanilla extract
  • 2 ounces hazelnut liqueur (Frangelico)
  • 3/4 cup sugar
  • 1/2 cup cocoa powder, sifted
  • 3 eggs, beaten
  • Chocolate Ganache, recipe follows

Preheat the oven to 375 degrees F. Spray an 8-inch round spring form cake pan with nonstick butter spray and line bottom with parchment.
Put the chocolate, butter, vanilla and hazelnut liqueur in a large bowl on top of a double boiler. Stir the mixture frequently until combined and smooth. Remove the chocolate from heat and put the bowl into an "ice bath" to cool the chocolate. *Don't let the chocolate get hard, just cool enough.
Mix in the sugar and cocoa powder. Stir in the eggs and pour into the prepared cake pan. Put the cake pan on a sheet tray and bake for 20 to 25 minutes.
Remove the cake from the oven and let cool completely.  Remove from spring form pan onto your serving tray and remove the parchment paper.  Pour the ganache over the cake. 

Chocolate Ganache:
Put the chocolate into a large bowl. Heat the cream in a small pot, over low heat, until hot to the touch. Pour the hot cream over the chocolate. Mix well with a rubber spatula until the chocolate melts.


The BEST Banana Bars EVER!


Today was a gorgeous day outside, perfect fall weather - sun shining, slight breeze, cool enough for a sweatshirt, just perfect.  Of course, to me, that meant I should bake something because I was in such a good mood.  Today was all about bananas ....

My mother brought home some over ripe bananas last week and I immediately put them in the freezer for a later baking date.  Her one request:  bake something for everyone at work.  OK, not a problem, I knew exactly what to make.  My grandmother's banana bars!  This is a no-fail, delicious, addictive recipe.


I grew up eating these bars and helping my grandmother make them is a very fond memory.  I can still picture them cut into bars and stacked on the oven, dusted with powdered sugar, waiting to be eaten ....

The aroma in the kitchen ... in the house ... is enough to get your taste buds watering.  There is nothing more homey then the smell of banana and vanilla wafting from the stove.  My kitchen still has that intoxicating smell from hours ago.  It has taken me all my strength to not eat it all!


These are traditionally dusted with powdered sugar.  However, for my mom's coworkers, I decided that a very thin cream cheese frosting layer would be a perfect mid-morning treat.

Without further yapping, here is the best banana bars recipe.

My Grandma's Best Banana Bars
1/2 cup butter, softened
3/4 cup sugar
2 eggs
3/4 cup sour cream
1 tsp vanilla
2 cup scant flour
1 tsp kosher salt
1 tsp baking soda
2-3 mashed bananas (over ripe the better)

Preheat oven to 350*F and prepare a cookie sheet.  Cream the butter and sugar.  Add eggs, sour cream, and vanilla.  In a separate bowl, sift together the flour, salt, and baking soda.  Add to the wet mixture until just combined.  Add in the mashed bananas.  

Bake on a cookie sheet for 30 minutes or until the top is golden brown and a toothpick comes out clean.

Serve with either powdered sugar or cream cheese frosting*.

* Cream Cheese Frosting:
3/4 stick of Neufchatel cheese
1 tsp vanilla
1 cup confectioners' sugar

Cream together the cream cheese and vanilla with a hand mixer.  Slowly incorporate the powdered sugar 1/4 cup at a time.  Spread evenly on the banana bars.

Tuesday, September 6, 2011

Chocolate Mint Layer Cake


If you love chocolate and mint ... why not make a chocolate mint layer cake covered in rich chocolate ganache?  Go ahead ... I know you want to ... I did.


I made this cake for my sister's 14th birthday.  It is so rich and decadent and delicious.  The only thing that didn't turn out as perfect as I wanted was the filling.  I don't think I whipped the heavy cream into stiff peaks - that was actually my first time whipping cream.

The recipe comes from Taste of Home.  However, instead of the frosting in the recipe, I made a chocolate ganache.  I mean, what is better than ganache?  Not much.


I have been meaning to make this cake again and messing around with the filling some more.  I hope that you give it a try and happy baking!


Chocolate Mint Layer Cake
(from Taste of Home)
Ingredients
1/2 cup butter, softened
1-3/4 cups sugar
3 eggs
4 ounces unsweetened chocolate, melted and cooled (use a double boiler)
1 teaspoon vanilla extract
3/4 cup milk
1/2 cup water
1-3/4 cups all-purpose flour, sifted
3/4 teaspoon baking soda
1/2 teaspoon kosher salt

Filling
1 cup heavy whipping cream
3 tablespoons confectioners' sugar, sifted
1/8 teaspoon peppermint extract
3 to 4 drops green food coloring

Icing
2 cups (12 ounces) semisweet chocolate chips
1 cup heavy cream

Preheat oven to 350*.  Grease and flour 2 – 9” cake pans.

In a large bowl, cream the butter and sugar until light and fluffy. Beat in eggs, one at a time, beating well after each addition. Beat in chocolate and vanilla. Combine milk and water in a measuring cup. Sift together the flour, baking soda and salt in a separate bowl; add to creamed mixture alternately with milk mixture, beating well after each addition.

Pour into prepared pans. Bake for 24-28 minutes or until a toothpick inserted near the center comes out clean. Cool for 10 minutes before removing from pans to wire racks.

For the filling: in a small bowl, beat the heavy cream until it begins to thicken. Add the sifted confectioners' sugar and peppermint extract; beat until stiff peaks form. Beat in food coloring. Place one cake layer on a serving plate; spread with filling. Top with second layer.

For the icing:  heat the heavy cream in a small sauce pan until the edges slightly start to bubble.  Pour over the chocolate chips and stir until all the chips are melted.  Let sit for a few minutes until the mixture starts to thicken.  Then pour over the cake

Carrot Cake with Cream Cheese Frosting


Carrot Cake ... veggies in a dessert?  Umm, actually yes, please!  I had never had carrot cake before my grandfather's birthday (his favorite) - but of course, I was up to the challenge.  Some recipes call for pineapple (eww) and walnuts (eww) and some don't.  Thankfully, my grandfather likes straight up carrot cake, no pineapple and no walnuts!!

You would think that a carrot cake would be healthy ... well healthier than other cakes ... but with the amount of oil, I think not.  After reviewing recipes, I decided to cut the oil in half because there is enough moisture from the carrots and it worked perfectly fine!

*One tip that I can give you is:  Grate the carrots very fine onto a towel and wring it out to get rid of the excess water in the carrots.  Too much water from the carrots + all the oil = soggy cake.

The cream cheese frosting is the same frosting I used on the Red Velvet cake for my sister's graduation.

My grandfather was my biggest critic and he really liked it.  It came out very moist and the carrots were grated so fine you couldn't tell they were in it.  Honestly, I'm not the biggest nutmeg fan, but it is essential in this recipe.

I hope that you try this recipe and happy baking!


Carrot Cake with Cream Cheese Frosting

Ingredients     (Cake adapted from Smitten Kitchen)
2 cups all purpose flour, sifted
2 tsp baking soda
1 tsp kosher salt
2 tsp ground cinnamon
½ tsp ground nutmeg
1 tsp ground ginger
¾ cup granulated sugar
1 cup light brown sugar, packed
¾ cup canola oil
3 large eggs
3 cups finely grated carrots (make sure to drain the excess water)

Preheat oven to 350*F.  Spray and flour two 9-inch cake pans.

Grate the carrots over paper towels, cheese cloth, or kitchen towel.  Once grated, wring out the excess water from the carrots.  Or, put the carrots in a mesh strainer for at least 30 minutes (or overnight, if you have the time) or so to drain more water from the carrots. 

In a medium size bowl, sift flour, baking soda, salt, cinnamon, nutmeg, and ginger.  In stand mixer bowl, beat sugars and oil until blended.  Beat in eggs one at a time.  Add flour mixture to the wet mixture and stir to combine.  Stir in the carrots.

Divide the batter between the two pans and bake for about 35-40 minutes (start checking around 35 minutes) or until a tester comes out clean.  Cool in the pans for 10 minutes, then turn onto the racks and let cool completely before icing.

Cream Cheese Frosting (adapted from Alton Brown)

16 oz. Neufchatel cream cheese
3 Tbsp butter, softened
1 tsp vanilla
2 cups confectioners’ sugar, sifted (roughly 9 oz)

Sift the confectioners’ sugar and set aside.  Cream the butter and cream cheese together until combined, then add the vanilla.  Slowly add the confectioners’ sugar a cup at a time – sifting each cup into the mixer – and beat between each addition.


Strawberry Shortcake


I bet when you think of Strawberry Shortcake, you think of the little circular sponge cakes you buy at the grocery store with macerated strawberries and whipped cream, right?  Well I usually do, too.  That is what my grandmother has always done for us and it's very satisfying.  But how about a little twist?

This shortcake is not a circular spongecake, but a vanilla cake that is sliced in half horizontally with a homemade strawberry rhubarb compote spooned between the layers, topped with fresh homemade whipped cream and fresh sliced strawberries.

The vanilla cake recipe is from the America's Test Kitchen Cookbook, and it is a different technique than a typical vanilla cake.  It is easy to do and results in a moist cake.  However, it doesn't rise too much so it is a thin cake.  I make this dessert at the restaurant and it is a big hit!


The strawberry rhubarb compote is very simple to make and doesn't take much time, either.  There is no exact recipe, so below the cake recipe I have written rough estimates to make the compote.  Since there is no correct way to make it, you can play around with ingredient amounts.

Enjoy and happy baking!


Vanilla Cake
(America’s Test Kitchen Cookbook)

Ingredients (makes 2 – 8” cakes)

1 3/4 cup cake flour, sifted
1 1/2 cup sugar
2 tsp baking powder
1 tsp kosher salt
4 eggs (room temperature)
½ cup milk
1 tbsp vanilla
2 sticks butter (cubed, slightly at room temperature)

Preheat oven to 325*F and grease and flour two 8” pans.

Mix dry ingredients into bowl of stand mixer.  Combine eggs, milk, and vanilla in small bowl.  Reserve one cup of the mixture.  On stir, add butter pieces to the dry mixture until coarse crumbs form (like big sand granules).  Once coarse crumbs form, slowly add the reserved one cup liquid mix.  Beat on high for 1 minute, until the mixture is fluffy and light in color.

Scrape down the sides of the bowl and add the remaining the liquid mixture slowly.  Beat on high for another 15 seconds or so.  Divide the batter equally between the pans and bake 20-25 minutes (closer to 20 minutes) or until they are golden brown and the cake tester is clean.

Let sit for 10 minutes in the pan and then turn onto a cooling rack to finish cooling.
Strawberry Rhubarb compote
Strawberry Rhubarb Compote

2 lbs. strawberries, hulled and sliced horizontally
2 or 3 stalks of rhubarb, cut in roughly 1/2" chunks
1/2 - 2/3 cup sugar 
2 - 3 Tbsp orange flavored liqueur (or more)
1 1/2 tsp ground cinnamon
1/2 ground cloves
pinch of salt 
1-2 Tbsp cornstarch

Hull and slice the strawberries into a bowl.  Add some sugar (roughly 1/4 - 1/3 cup) to macerate and set aside for about 15 minutes.  Cut the rhubarb into chunks.  Heat a skillet with oil to med-high.  Add the rhubarb and some sugar (roughly 1/4 cup) and saute until the rhubarb releases juices and softens (about 5 minutes).  Set aside.  Separate the strawberries from their juice and put the strawberries in a sauce pan on medium low.  Add the rhubarb and some orange liqueur.  Add the spices and salt and let simmer until the strawberries begin to get soft and the juices are bubbling.  At this point, add the cornstarch in a small bowl.  Spoon out a few scoops of the liquid from the sauce pan and stir to dissolve the cornstarch.  Add this mixture to the sauce pan and let simmer for a few more minutes to thicken up.  Let cool and add to the sliced cake.


Cake Truffles


I love the idea of cake truffles!  They are so fun to play around with, easy to make, and easy to eat!!  Several months ago, I was making a birthday cake and had left over cake (from all the trimmings).  I didn't know what to do - I didn't want to eat it all and I didn't want to throw the excess away - so I went to the internet for answers.  I came across several sites that used the excess cake to make cake truffles - AWESOME and YUMM.

They were so fun to make and such a hit that I made them for Valentine's Day at the restaurant (and a few catering events).  When you bite into the truffle, the cake isn't crumbly or light, but rich and fudge-like!!

Take your left over cake trimmings and form them into small balls (roughly a heaping tablespoon size).  If the cake is on the drier side, add some liquid to moisten the cake before forming into balls.  I had a chocolate cake, so I used some Kahlua to moisten the cake and add depth of flavor.  Once the balls are formed, put them in the freezer for 30 minutes or until they have hardened.


When they are ready, start to make the coating.  I made a chocolate coating then I drizzled white chocolate over the top for pretty design.  Use a double boiler to melt your chocolate and keep the bowl over the heat while rolling the cake balls, to keep the chocolate pliable.  When the chocolate is ready, roll your cake balls into the bowl (I use two forks to roll them) and quickly place them on wax paper to cool.  When the chocolate coating is dry, you can do another coating for a design if you want - like I said, I used white chocolate to drizzle over as the design.  You can store them in the freezer until ready to serve!

Raspberry Sauce served with the Truffle as a dipping sauce
I used the chocolate cake recipe from the Chocolate Cupcakes in the Hello Everyone post.

Enjoy!